
Webhooks are the foundation of TapeAlert, allowing you to receive events from your Tape workflows and route them to various notification destinations. This guide will show you how to create and set up webhooks for your Tape organization.
On this page
Prerequisites
Before you begin, make sure you have:
- Added your Tape organization to TapeAlert
- A valid Tape API key with access to your organization
- Access to your Tape workflow settings
Don't have a Tape organization yet?
Learn how to add a Tape organization to your account.
Creating a webhook
To create a new webhook:
-
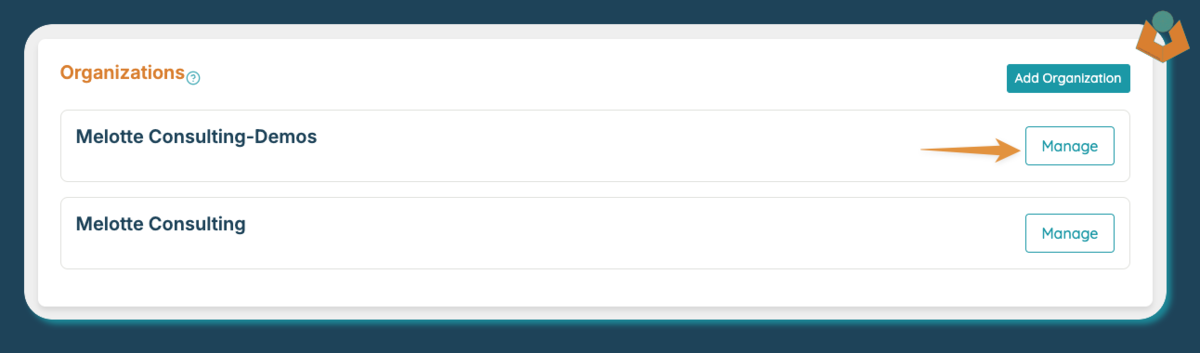
Navigate to your organization
From the dashboard, click on your organization name to access the organization details page.
-
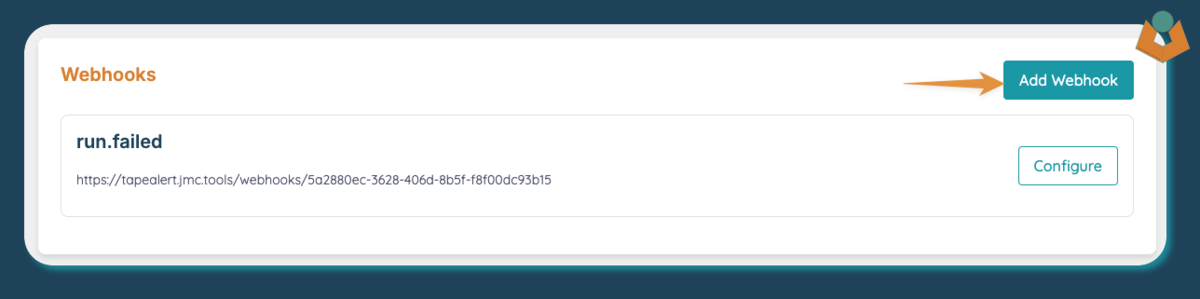
Add new webhook
Click the "Add Webhook" button in the webhooks section of your organization page.
-
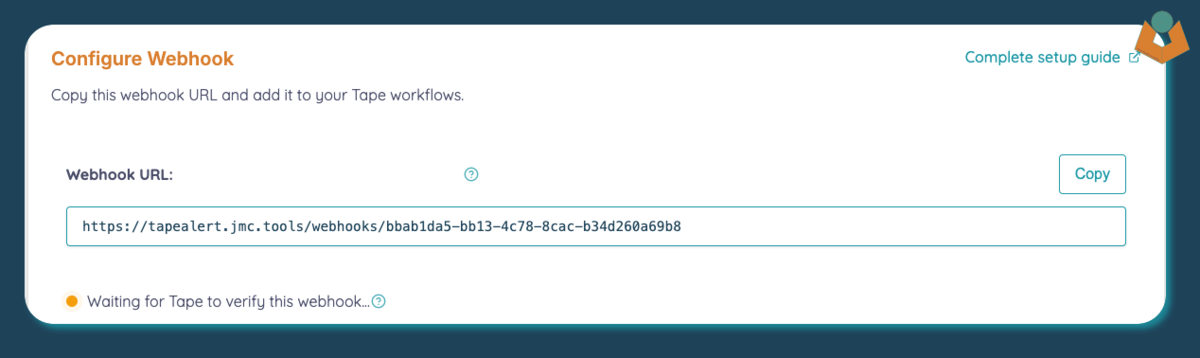
Copy webhook URL
A unique webhook URL will be generated. Copy this URL as you'll need to add it to your Tape workflow.
Tip: The webhook URL includes a unique identifier and can't be customized. This ensures security and prevents URL guessing.
Adding the webhook to Tape
Now that you have your webhook URL, you need to add it to your Tape workflow:
-
Open your Tape workflow
Log in to your Tape account and navigate to the Automations Run page.
-
Configure error notifications
Click on the three dots in the top right of the screen, then on "Webhook Notifications" section.
-
Add webhook URL
Select the 'type' of notification you want to setup and paste the webhook URL you copied from TapeAlert and save your settings.
Webhook verification
When you add the webhook URL to Tape, it will automatically send a verification request. This process happens in the background, and your webhook will be verified automatically.
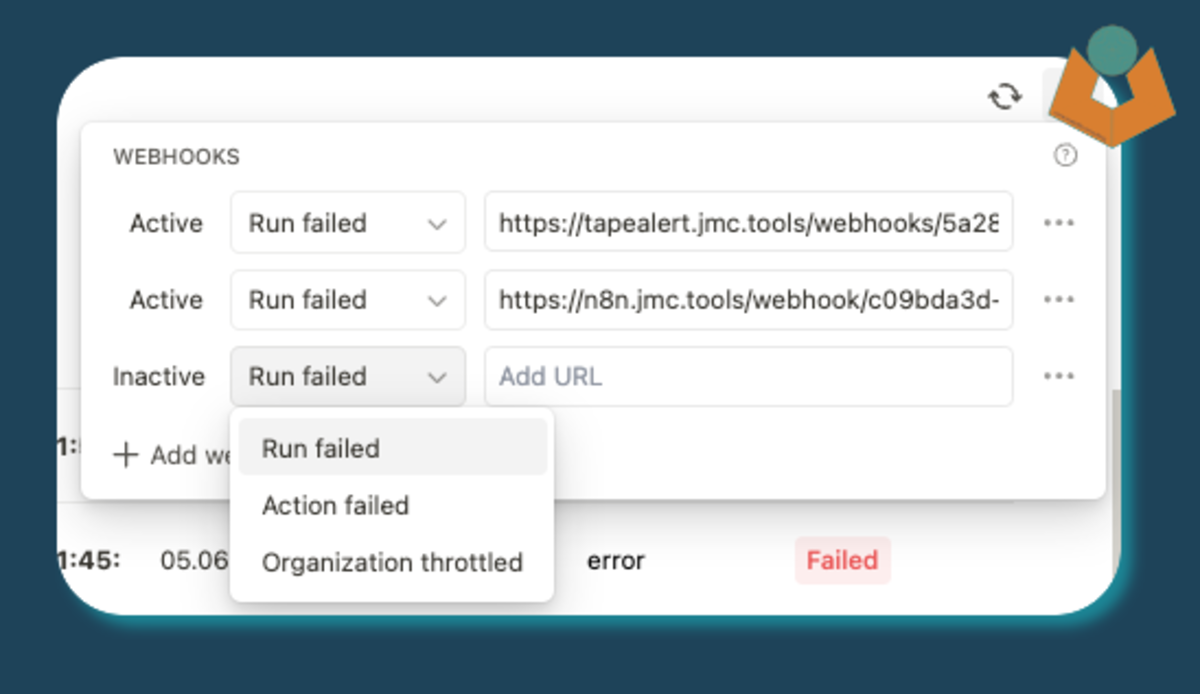
The verification process involves:
- Tape sends a verification request to the webhook URL
- TapeAlert receives the request and validates it
- The webhook status updates from "Inactive" to "Active"
- The webhook type is determined (run.failed, action.failed, org.throttled)
Important: Verification can take a few minutes. If your webhook remains in "Pending Verification" status for more than 15 minutes, verify that you've added the correct URL to your Tape workflow.
Testing your webhook
Once your webhook is verified, you can test it to ensure it's working properly:
-
Add notification destinations
First, ensure you've added at least one notification destination (email, Google Spaces, etc.).
-
Trigger a test event
You can either:
- Intentionally cause an error in your Tape workflow
- Use the test functionality in Tape's webhook configuration
-
Check notification logs
In the webhook details page, check the "Notification Logs" section to see if the event was received and processed.
Next steps
Now that you've set up your webhook, you can configure notification destinations to receive alerts: